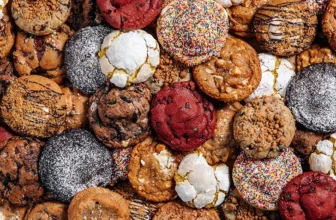
In this comprehensive guide, you’ll discover the art of baking the greatest perfect chocolate chip cookies of all time, a delightful skill that can elevate your dessert game to new heights. Did you know that the very first chocolate chip cookie was created in 1938 and has since become an essential comfort food for millions? With our easy-to-follow steps, you’ll learn how to achieve that ideal balance of crispy edges and chewy centers, ensuring your cookies are not only delicious but also evoke warm, nostalgic memories. Whether you’re a seasoned baker or a novice in the kitchen, this guide is here to support you every step of the way in creating treats that can brighten anyone’s day.
Gather Your Ingredients
- Gather all necessary ingredients: all-purpose flour, baking soda, salt, unsalted butter, brown sugar, granulated sugar, vanilla extract, eggs, and chocolate chips.
- Ensure everything is at room temperature for optimal mixing; this includes letting the butter and eggs sit out for about 30 minutes.
- Measure each ingredient accurately to guarantee consistent results in your baking adventure.
- Organize your workspace, placing your ingredients within easy reach to streamline the mixing process and keep you energized!
Preheat the Oven
Preheat your oven to 350°F (175°C). This step is crucial because it ensures that your cookies bake evenly and develop the perfect texture. For example, if you place your cookie dough in a cold oven, the outside may burn while the inside remains doughy, resulting in a disappointing treat. Turn the oven dial or press the digital button until it reaches the desired temperature, and allow it to preheat fully before placing your cookies inside. Keep an eye on the indicator light or listen for the beep, signaling that your oven is ready to create delicious, perfectly baked cookies!
Mix the Dry Ingredients
Whisk together the flour, baking soda, and salt in a medium bowl until they are evenly combined. Make sure there are no lumps in the flour for a smooth batter later. Once mixed, set this dry ingredient mixture aside carefully; it will be combined with the wet ingredients in the next steps of your recipe. Keep it within easy reach as you move on to the next delicious part of your cooking adventure! Get ready for some chocolate chip delight.
Cream the Butter and Sugars
Cream together the softened unsalted butter, brown sugar, and granulated sugar in a large mixing bowl.
- Use an electric mixer on medium speed or a sturdy wooden spoon to combine the ingredients until the mixture becomes light and fluffy.
- Scrape down the sides of the bowl as needed to ensure everything is well mixed.
- Keep mixing for about 3-5 minutes, watching as the color lightens and texture becomes airy.
This process is crucial because it incorporates air into the mixture, which not only enhances the texture of your cookie dough but also helps your cookies rise beautifully during baking!
Add the Eggs and Vanilla
- Beat in the first egg until it’s fully incorporated into the mixture. This ensures a velvety texture that enhances your batter’s richness.
- Add the second egg and repeat. You should notice the mixture becoming smoother and thicker—this is a good sign!
- Once both eggs are combined, pour in the vanilla extract. Use pure vanilla for the best flavor; it brings warmth and depth to your dish.
- Whisk everything together until the batter is silky and uniform. You want to see no streaks of egg or vanilla—this means you’re on the right track!
Combine Wet and Dry Ingredients
- Gradually add the dry ingredients to the wet mixture, incorporating them slowly to maintain the texture you desire. This step is crucial for achieving that soft and chewy cookie consistency you love!
- Stir just until combined—don’t worry if there are a few small lumps; it’s better than a perfectly smooth batter that can lead to tough cookies.
- For example, if you’re mixing your chocolate chip cookie batter, add in your flour, baking soda, and salt in parts.
- Use a wooden spoon or rubber spatula for gentle folding; it’s the best way to ensure you keep that airy quality without overmixing.
- Keep an eye on the timer; once the ingredients start coming together and losing the powdery look, stop mixing and scoop the dough onto your baking sheet!
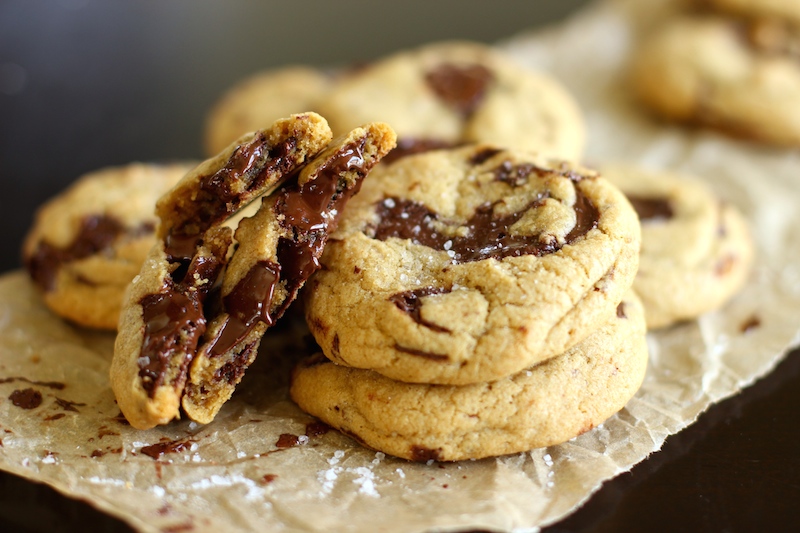
Fold in the Chocolate Chips
Gently lift the spatula from the bottom of the bowl and fold it over the top of the dough, incorporating the chocolate chips as you go. Make sure to rotate the bowl as you work to ensure even distribution—this way, every chocolate chip cookie will have that delicious burst of chocolate in every bite! If you love a bit of crunch, toss in some chopped walnuts or pecans at this stage, and fold them in with the same careful motion. Keep folding until the chocolate chips and nuts are beautifully integrated into the dough, without overmixing.
Scoop and Bake
Scoop rounded balls of dough using a cookie scoop or tablespoon. Space them evenly on a lined baking sheet, making sure to leave enough room for spreading. Bake in the preheated oven for 10-12 minutes, keeping an eye on them until the edges turn golden brown while the centers appear slightly underbaked. Remove them promptly from the oven to let them cool on the baking sheet for a few minutes before transferring to a wire rack. Enjoy the delightful aroma and the anticipation of delicious cookies!
Final Tips for Success
In conclusion, you’ve now mastered the art of baking perfect chocolate chip cookies! With the right ingredients, techniques, and a sprinkle of love, your kitchen will be filled with that irresistible aroma of freshly baked goodness. Allow your cookies to cool, and then savor each delicious bite. Remember, the more you practice, the better you’ll become. So grab your mixing bowl and get baking—your cookie cravings are just a batch away! Enjoy every crumb! 🍪✨
Essential Baking Supplies
Essential Baking Insights
Step-by-Step Instructions for Baking Perfect Cookies Every Time
- Choose a Simple Recipe: Start with a basic cookie recipe like chocolate chip or sugar cookies. These recipes typically have fewer ingredients and are easier to follow!
- Gather Your Ingredients: Before you begin baking, make sure you have all your ingredients measured out and ready to go. This will make the process smoother and more enjoyable!
- Follow the Instructions Carefully: Read through the entire recipe before you start. Pay close attention to the steps, baking times, and temperatures—I promise, it’ll make your baking experience a breeze!
- Use Quality Ingredients: Opt for fresh, quality ingredients for the best flavor. You’ll notice the difference in your cookies, and they’ll be even more delicious!
- Don’t Forget to Have Fun: Baking is all about creativity! Feel free to experiment with different add-ins like nuts, fruits, or spices. Get excited and let your cookie-baking journey begin!
- Happy baking my favorite Chocolate Chip Cookie by David’s – get your dough on! 🍪
Your Sweet Questions Answered
When it comes to melting and dipping cookies, you’ll want to choose chocolates that have a smooth consistency and melt easily. Here are the best types for your cookie-dipping adventures:
- Semisweet Chocolate: This is a favorite for many bakers! It melts well and has a balanced sweetness, making it perfect for dipping cookies like Oreos or homemade ones.
- Milk Chocolate: If you love a creamier, sweeter taste, milk chocolate is the way to go. It melts smoothly and adds a deliciously sweet coating to your cookies.
- Dark Chocolate: For a richer flavor, dark chocolate is a fantastic option. It melts beautifully and pairs wonderfully with various cookies, especially those with nuts or fruits.
- Candy Melts: These are great if you want a wide range of colors and flavors. They’re specifically designed for melting and dipping, making your cookie decoration easier and fun!
- White Chocolate: If you enjoy a sweet and creamy taste, white chocolate can add a delightful contrast to cookies. Just be mindful that it can sometimes seize up, so keep an eye on the melting process!
Make sure to use a double boiler or a microwave on low power to avoid scorching your chocolate. Happy dipping! Your cookies are about to get a delicious upgrade!
Absolutely, decorating cookies with royal icing can be such a fun and creative process! Here are some tips to help you get started and make your cookies truly shine:
- Make the Right Consistency: Ensure your royal icing has the right consistency for the task. For outlining, you want a thicker icing, while flooding (filling in) requires a thinner icing. You can achieve this by adjusting the water content.
- Use a Piping Bag: Invest in good-quality piping bags and tips for precise control when decorating. For detailed work, smaller tips like 1 or 2 are great to use.
- Prep Your Cookies: Make sure your cookies are completely cooled before decorating. This will prevent the icing from melting or blending together.
- Practice Piping Techniques: Take some time to practice different techniques, such as piping borders or creating flood designs. The more you practice, the more comfortable you’ll become!
- Let Each Layer Dry: If you’re using multiple colors or layers, allow each layer to dry completely before adding the next. This ensures that the colors won’t bleed together.
- Add Details: Use edible markers, glitter, or additional piping to add extra flair to your designs. Think outside the box with techniques like sprinkles or sugar pearls!
- Storage: Once your cookies are decorated, let them dry completely—ideally overnight—before storing. Store them in an airtight container to keep them fresh!
- Have Fun: Most importantly, enjoy the process! It’s all about expressing your creativity, so don’t stress too much about making everything perfect.
Now, get ready to impress everyone with your beautifully decorated cookies! Happy decorating! But remember Chocolate Chip cookies don’t need no decoratin’ 🍪✨