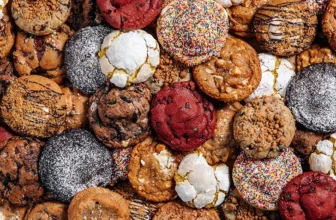
This step-by-step guide on decorating cookies offers a thorough and accessible approach for both novice and experienced bakers so you too can make your delights look as good as Cheryl’s Cookies does. We cover essential tools and materials needed for decoration, such as royal icing and food coloring, and provide clear instructions on how to achieve the perfect consistency for icing – read on. This guide also explores various techniques for creating intricate designs, from simple patterns to more elaborate motifs, allowing you to personalize your cookies for any event. With practical tips and creative ideas, you’ll be equipped to transform plain cookies into stunning creations that delight both the eyes and the taste buds. Cheryl’s Birthday Cookie is my favorite.
Gather Your Ingredients and Tools
- Gather all essential ingredients: icing sugar, egg whites, and food coloring.
- Measure out the correct amounts to avoid rushing back to the pantry mid-decorating.
- Collect your tools: piping bags, a variety of piping tips, and a flat surface for decorating.
- Ensure everything is clean and within arm’s reach before diving into the decorating frenzy.
Prepare the Royal Icing
- Combine egg whites and icing sugar in a mixing bowl, ensuring that no lumps are lurking in there like shy mice. Use approximately 2 egg whites for every 4 cups of icing sugar for the right balance.
- Mix the ingredients on medium speed until the icing takes on a smooth and glossy consistency, resembling a fluffy cloud ready for a sugar storm. If it’s too thick, add a tiny splash of water; if it’s too runny, sprinkle in a bit more icing sugar.
- Divide the icing into separate bowls, depending on how many colorful creations are on the agenda. Imagine this like a rainbow waiting to happen!
- Add food coloring to each bowl and mix thoroughly until you achieve your desired shade—don’t be shy; channel your inner artist! For example, a few drops of red can bring out a stunning pink, while mixing in some blue can lead to a cheery sky blue.
- Remember, a little goes a long way with food coloring, so start small and build it up. No one wants to create a sugar explosion!
Outline the Cookie
- Grab a piping bag and fit it with a small round tip, ensuring it’s tight and secure like a fortress wall.
- Fill the bag with your prepped royal icing, making sure to squeeze out any air bubbles, because nobody likes a deflating balloon!
- Position the bag at one edge of the cookie and carefully pipe a steady line along the perimeter, creating a barrier that looks like it might just hold the cookie world together.
- Join the end of your piping line back to the starting point to complete your border, feeling like a master architect crafting the perfect cookie kingdom!
Flood the Cookie
- Prepare a thicker version of royal icing, ensuring it’s not too runny. Aim for a consistency that holds its shape but is still spreadable; think of it as the perfect icing for a cake daydream!
- Carefully grab a toothpick or a small spatula. This nifty tool will become your icing wizardry wand!
- Dip the toothpick or spatula into the thicker icing and begin to fill the outlines of your cookies. Move smoothly and steadily to prevent any icing spills; after all, we want cookies, not icing puddles!
- Spread the icing evenly, using the tool to nudge it into the corners and make sure it reaches the edges. You can use a gentle back-and-forth motion, much like painting a masterpiece—except this masterpiece is delicious and likely to be devoured!
- If you notice any air bubbles, don’t panic! Just gently tap the cookie on the counter, and watch the air escape like it just realized it forgot to bring a dessert for the party.
Add Decorative Elements
Once the flooded base layer has dried, grab your piping bags filled with royal icing and select various piping tips for different effects. Pipe simple lines or intricate swirls onto the cookies, letting creativity run wild! Experiment with contrasting colors for the icing to make those designs really pop and stand out. Don’t be shy—layer designs for extra flair and watch the cookies transform into little edible works of art! This is the FUN part.
Incorporate Edible Decorations
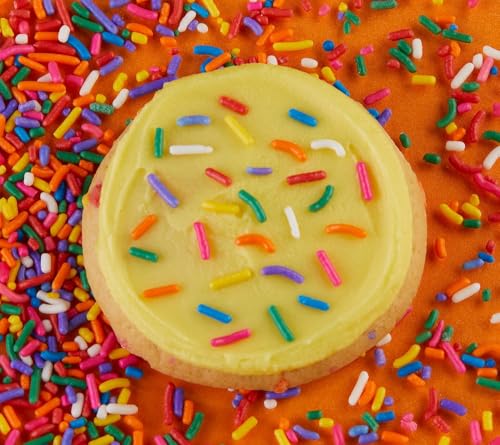
Add a splash of joy by decorating with edible sprinkles, colored sugar, or edible glitter. Spread icing on your treats and, while it’s still wet, generously sprinkle your chosen decorations over the surface. Ensure even coverage by using a light touch and giving them a little shake to avoid clumping. If you’re feeling adventurous, mix different colors and shapes for a festive flair that will dazzle and delight!
Let the Cookies Dry
Allow the decorated cookies to dry completely at room temperature. Place the cookies on a wire rack or parchment paper to ensure good air circulation around them. Resist the urge to sneak a taste; the icing will remain soft if touched too soon! Depending on the thickness of the icing, this drying process may take several hours or even overnight, so be patient and let the magic happen.
Store or Present Your Cookies
Store your cookies in an airtight container after they’ve completely dried to keep them fresh and delicious. Choose a container that seals tightly; a glass jar with a lid or a plastic container works wonders. Alternatively, present the cookies on a decorative platter, perhaps a vintage one or something with a pop of color—this not only showcases your baking skills but also makes it easier for guests to sample the treats. Arrange the cookies in a delightful pattern, maybe even stacking some for height, and don’t forget to sprinkle a few chocolate chips or colorful sprinkles on top for that extra flair!
Final Tips and Inspiration
In conclusion, by following these simple steps, anyone can turn ordinary cookies into dazzling masterpieces that are sure to impress. With a sprinkle of creativity and a dash of patience, these cookies will not only catch the eye but also tantalize the taste buds. So, unleash your inner artist, enjoy the decorating process, and get ready to share your sweet successes with family and friends—because nothing says “I love you” quite like a beautifully decorated cookie (or ten)!
Essential Supplies Needed
Decorative Techniques Unveiled
Step-by-Step Guide to Crafting Authentic Delight
- Savor Them with a Sidekick: Pair these crispy gems with your favorite beverage! Whether it’s coffee, tea, or even a cheeky glass of milk, they’ll taste even better with a sidekick.
- Bake and Share: Feeling generous? Bake a batch and share them with friends or family. Just watch out for cookie thieves—they have a way of appearing when delicious treats are around!
- Creative Combinations: Get crafty and use Cheryl’s cookies as a base for a dessert parfait. Layer them with yogurt or whipped cream and fruit for a tasty, guilt-free treat. Who knew cookies could be healthy, right?
- Experiment with Flavors: While traditional flavors are delightful, don’t be shy! Try crumbling them over ice cream for an exciting twist or use them as a crust for cheesecakes. Genius, isn’t it?
- Festive Gift Wrapping: Package them up in a cute tin or box for a wonderful homemade gift. They’re great for any occasion—just don’t forget to include a “Cheryl’s Cookies are my Love Language” card!
- And there you have it! A simple guide to enjoying those delightful Cheryl’s cookies to their fullest. Happy munching!